
|

|

|

|

|

|
| Home | Manuals | Supplies | Search | Consult | Contact | Testing | Service |
|
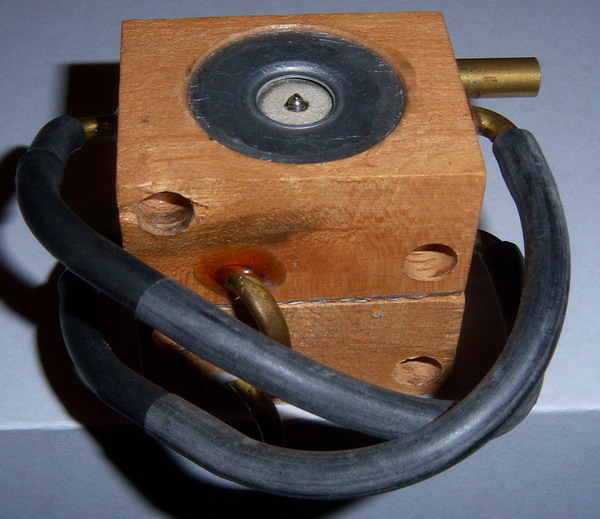
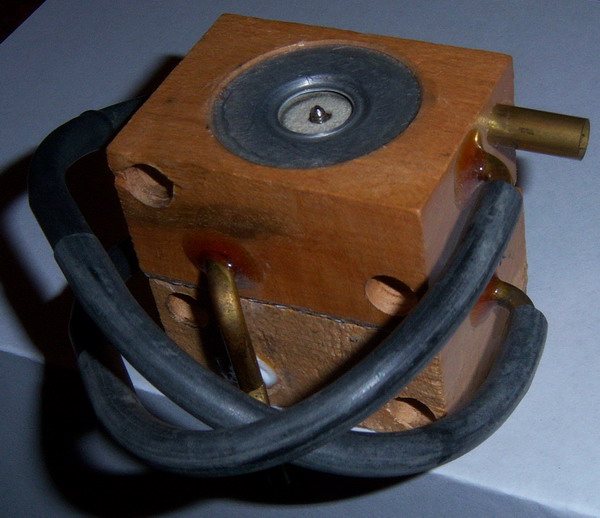
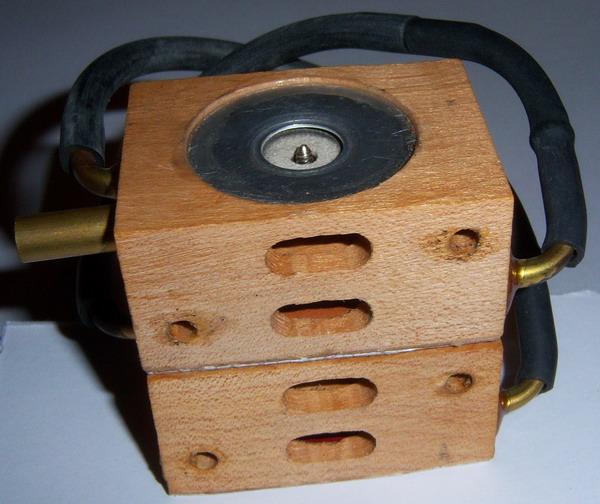
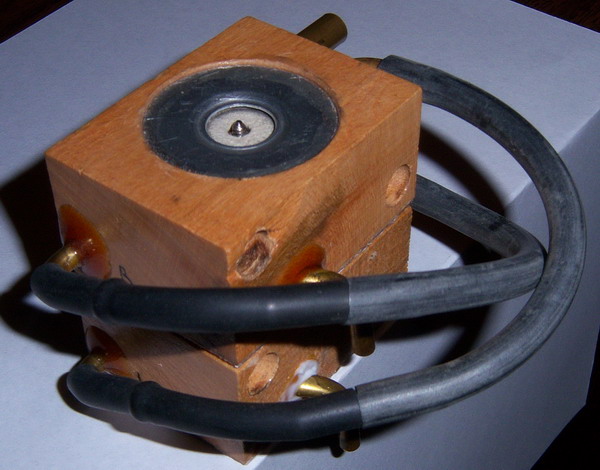
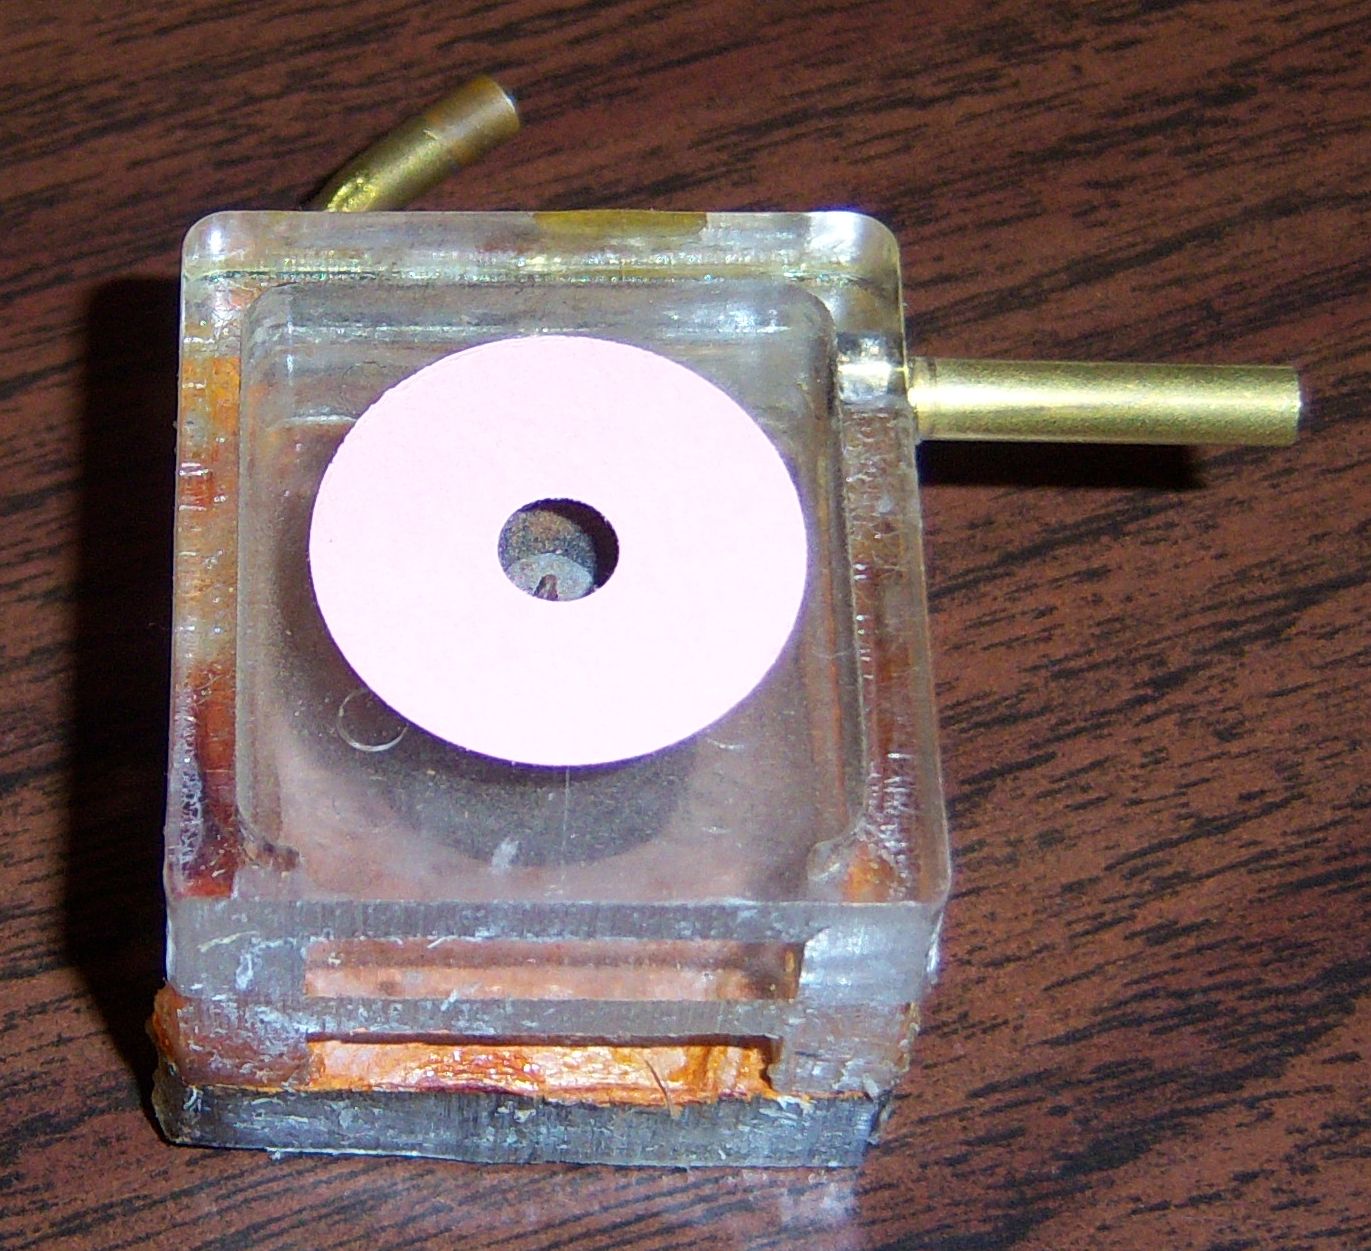
One of the more interesting devices in nickelodeon and orchestrions is the Lock-and-Cancel (L/C) valve. L/C valves are also found in Reproducing player pianos, but they are always integral parts of a larger and more complex device. Many types of L/C valves have been invented since the first nickelodeons and orchestrions were produced over 110 years ago. For those who are interested in seeing a number of these devices and how they are manufactured, Craig Brougher has a whole chapter on Lock-and-Cancel valves in his book "The Orchestrion Builder's Manual and pneumatics handbook". However, here we are only going to cover one of the most common types of L/C valves found in nickelodeon 'build-ups', which are basically comprised of two Wurlitzer-type block valves -like the ones pictured above. The purpose of an L/C valve is really quite simple. It can accurately be compared to a regular On-Off switch of virtually any variety. Simply put, once it's turned 'On', it will stay 'On' until it's turned 'Off'. And, it will stay 'Off' until it's turned back 'On' again. The major difference between an On-Off switch and a L/C valve is the manner in which it gets turned 'On' and 'Off'. While an 'On-Off' switch is manually activated by a human or other mechanical device, an L/C valve is activated by perforations in a music roll. More precisely, one hole in the roll turns the valve assembly 'On' and another hole in the roll, which is in a different hole position on the roll, turns the assembly 'Off'.
Having the ability to turn something 'On' at any particular moment and turn it back 'Off' at a later moment is extremely useful and necessary when it comes to nickelodeon music. While L/C valves are often used for turning various instruments, like an accordion, a honky-tonk rail, or a glockenspiel 'On' and 'Off' during a song, this treatise will focus on using the L/C valve to control the Rewind and Play cycles in a nickelodeon. When used for this purpose, the L/C valve allows the nickelodeon music roll to play through each of the songs on the music roll until the last song has finished playing. Then, a perforation in the roll signals the L/C valve to change state from 'Off' to 'On'. When this happens, the L/C assembly applies vacuum to a bellows which moves gears in the roll transport mechanism, and the music roll starts rewinding. And, since the L/C valve assembly is "locked" 'On', it will continue to apply vacuum to the rewind bellows, which 'holds' the system in Rewind, even though the perforation which turned the assembly 'On' is no longer present. Then, as the music roll nears the end of the rewind cycle, another perforation signals the L/C valve assembly to turn the vacuum to the rewind bellows back 'Off'. This bellows, being spring loaded, then returns the roll transport mechanism to the Play position, completing the cycle. To fully understand how a L/C valve assembly works, you first need to understand how a normal player piano valve functions. If you don't have this basic knowledge, read the information here. It's important because you need to understand that a regular player piano valve is like a 'momentary' on switch. In other words, it only comes 'on' when a perforation in the music roll is present. After it passes, the valve turns back 'off'. Similar to a regular 'On-Off' light switch, a L/C valve assembly has only two states. Referring to the diagram below, in the 'Play' state, valve A is 'On' and valve B is 'Off'. In the 'Rewind' state, valve B is 'On' and valve A is 'Off'. While that sounds simple enough, the question is: How does that work? In the diagram below, the set of valves on the left show the state of the two valves after the Play hole in the trackerbar has been 'opened' and then closed. The set on the right shows the state of the valves when the Rewind Port on the trackerbar gets 'opened' and then closed. The color Yellow represents Vacuum and the color Blue represents Atmosphere. The large port on the right side of the upper (or Rewind) valve gets connected to the Rewind bellow. The small Rewind Port and Play Port get connected to the Rewind and Play Ports on the trackerbar, respectively.
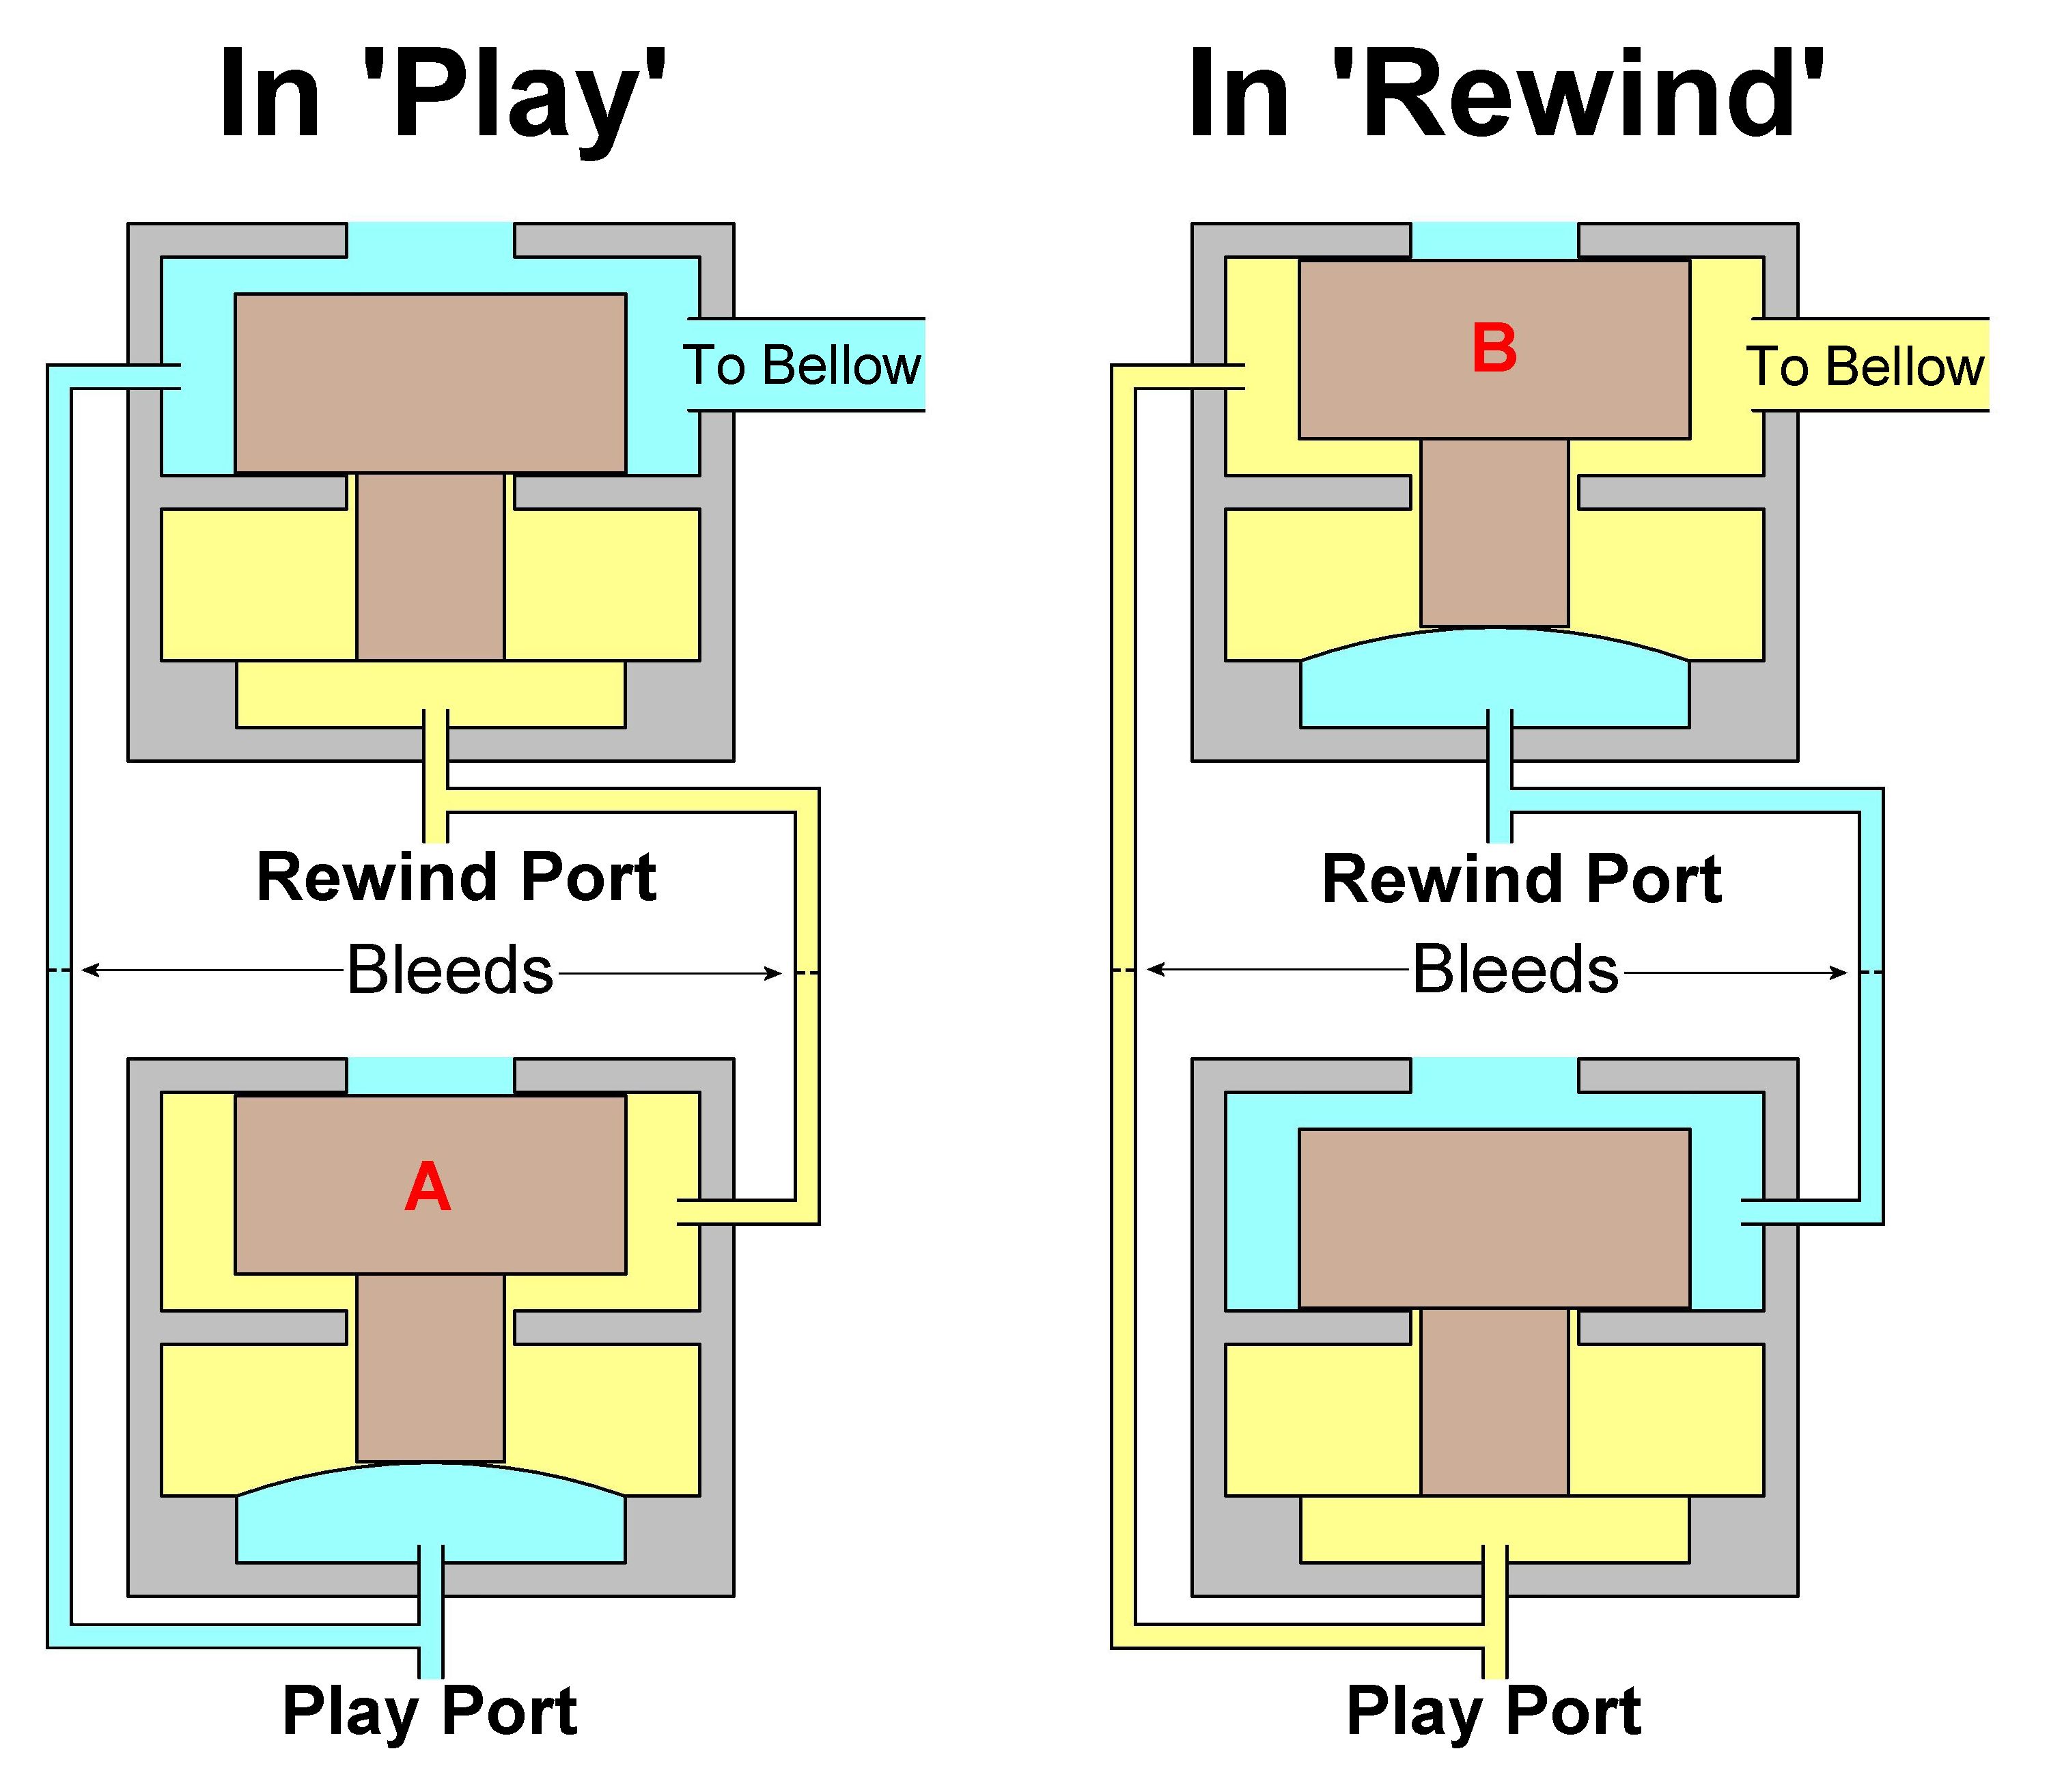 Before we get too deep into the explanation of how this device actually works, it's important to note one critical difference between these valves and regular player valves. As you hopefully recall from the study about regular valves, every valve has its own bleed. The function of the bleed is to allow the pouch to relax very quickly after the valve has been deactivated (or turned 'Off'). However, note that these valves don't have a 'built-in' bleed. Instead, there is a bleed for each pouch in the signal line that connects the atmosphere side of each valve to the pouch well of the other valve. (In the diagram, note where the bleed are located.) Keep this fact in mind as we continue. Referring to the diagram below, initially, when vacuum is applied to the valves, and there are no signals coming from the trackerbar (because the music roll is covering or closing both the Play and Rewind Ports on the trackerbar), both valves are in the 'Off' or relaxed position. Also, there is an equal amount of vacuum being applied to the center chamber of both valve blocks because the blocks are connected to a common vacuum source. Now, if you follow either the blue signal line or the yellow signal line on the sides of the valve assemblies, you see that both of them provide a path for atmosphere the enter the pouch of their 'sister' block. However, also notice that these same lines provide a path for vacuum to the 'sister' block. This is where it gets a little tricky.
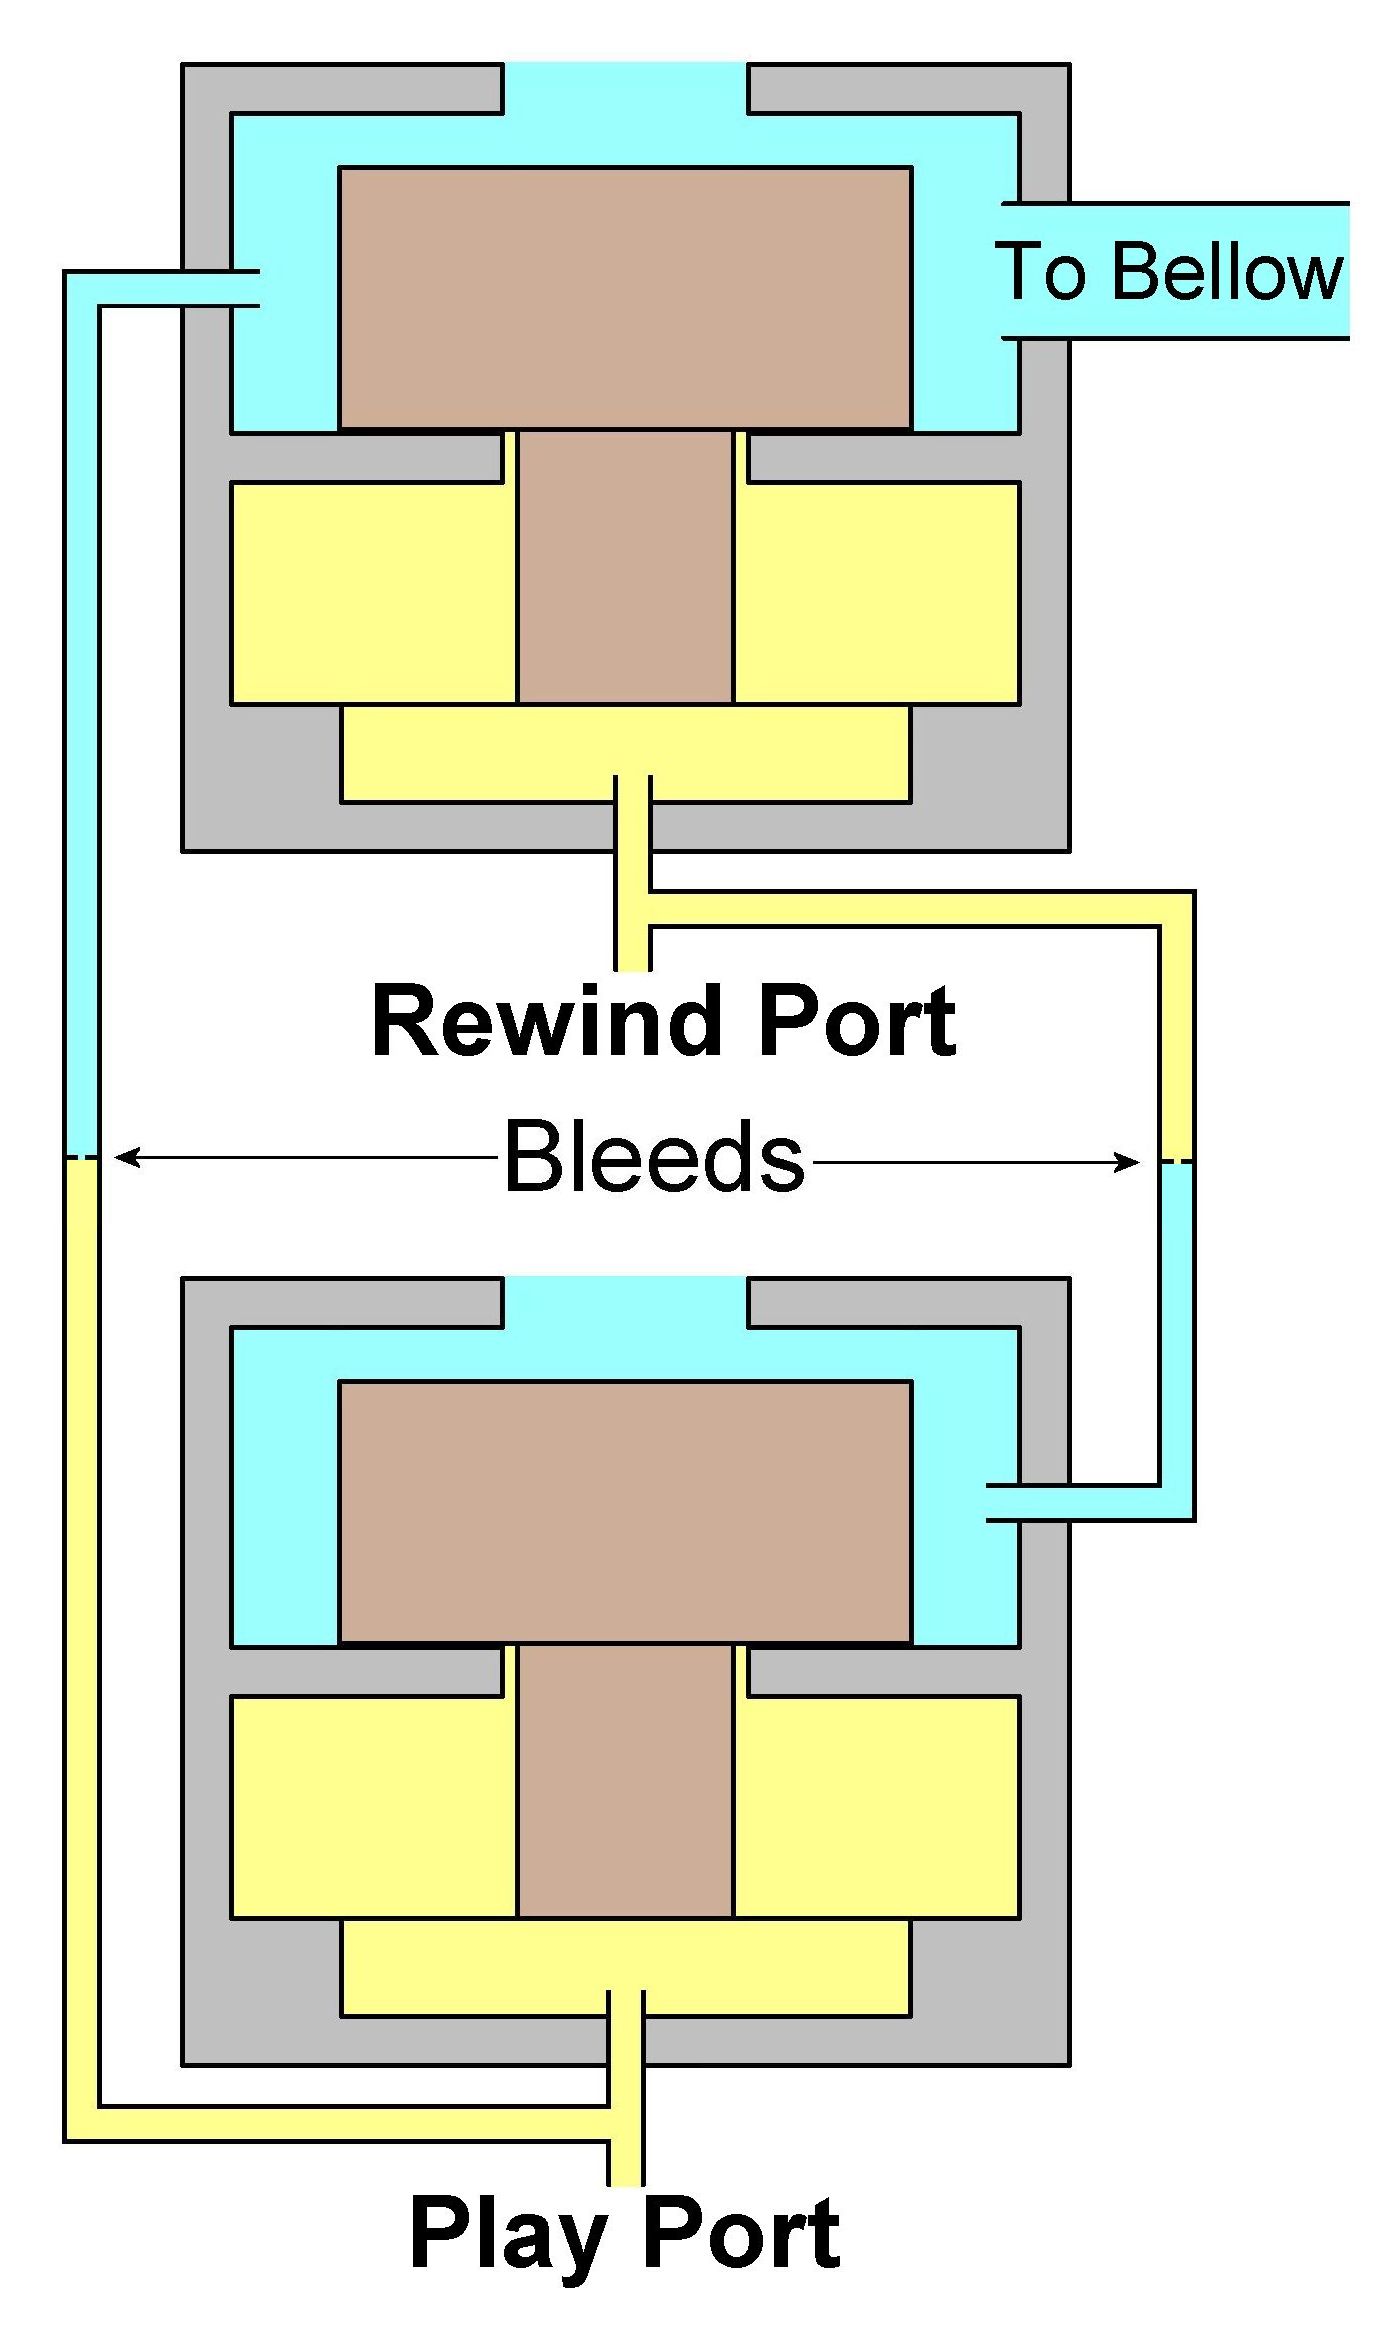 Theoretically speaking, if both valve blocks were 100% identical, the valves would end up getting to a state where they are both half-open -or completely balanced- and both would be leaking vacuum to the atmosphere. However, as can also be seen in the diagram, they are not 100% identical. In fact, the Rewind valve has an extra port that is labeled 'To Bellow'. In effect, this is another path to atmosphere because there is atmosphere inside the Rewind bellow. And, that being the case, there is an imbalance between the two valve blocks and valve 'A' activates (see First Diagram). More precisely, the 'hole' leading to the Rewind bellows is about 1/2 the diameter of the hole in the top of the valve block. So, as both valves attempt to activate, there is more atmosphere in Rewind block than in the Play block, and that being the case, the valve in the Rewind block will be 'pushed' closed before the valve in the Play block. (For a more detailed explanation of why this happens, click here) Once that occurs, two things happen. (1) There is a path to atmosphere from the Rewind block to the pouch in Play block. (2) There is a path for vacuum from Play block to the pouch in the Rewind block. As a result, the assembly is "Locked OFF" even though both the Rewind Port and the Play Port are closed. So, at this point the assembly is 'Locked Off', and it will stay locked off until the Rewind Port on the trackerbar is opened by a perforation which follows the last song on the music roll. When the Rewind Port opens, atmosphere enters the pouch well in the Rewind block, activating its valve. Bear in mind that the Play valve is still 'On'. We'll get to that shortly. At that moment, three things happen almost simultaneously. One, vacuum is applied to the Rewind bellows and it begins to collapse, shifting the roll drive mechanism from the Play mode to the Rewind mode, and the roll begins to rewind. Two, when the valve in the Rewind block changes to the 'On' state, the path for atmosphere, that was keeping the valve in the Play block activated, is closed and the same vacuum that is collapsing the Rewind bellows is now also being channeled to the pouch well in the Play block. This action causes the valve in Play block to deactivate. As soon as that happens, a path to atmosphere (through the hole in the top of Play block) is provided to the pouch well in Rewind block (via the green signal line), which keeps the valve in Rewind block activated. In this state, the assembly is "Locked On". Three, at the instant that the Rewind Port on the trackerbar opens, a 'full strength' signal inflates the Rewind pouch. This atmosphere signal is at least six times stronger than the vacuum signal coming from the Play valve block which was keeping the Rewind pouch relaxed. This is true because the hole in the trackerbar is at least six times larger than the hole in the bleed. Thus, the Rewind pouch easily inflates. The assembly will stay 'Locked On' until the Play hole in the music roll opens the Play port in the trackerbar which allows atmosphere to enter the pouch well of the Play block, which activates the valve in the Play block. And, once again and for the same reasons explained previously, the assembly is "Locked Off". Here's a short YouTube video I shot using modern Aeolian Block Valves that were modified to work as lock-and-cancel valves. It demonstrates how the assembly operates. Below are the three YouTube videos I posted about the assmebly.
Thought not completely relevant to this treatise, it's important to mention a few more things. First, the Rewind perforation in the music roll is generally about 1/2" in length. It can be that short because the music roll is only traveling at about 7-8 feet per minute and it only takes about 1/4 of a second for the assembly to change from the Locked Off state to the Locked On state. Secondly, the Play perforation in the music roll is generally 3-4 inches in length and there are typically two of them. The two long perforations are typically separated by a short space of about one inch. These long perforations are necessary because during rewind the paper is traveling over the trackerbar at about 40-50 feet per minute. Thirdly, while it still only takes the valves about 1/4 of a second to change back to the Locked Off state, it takes the Rewind bellows a second or two to return to fully open, which again places the roll drive mechanism in the forward Play mode. I will try to explain why valve A opens and valve B stays closed when vacuum is first applied to the assembly. While we can't see the air that's being sucked into the valve blocks as vacuum is applied, we know that air has mass and moving air exerts pressure on the things it comes in contact with, including valves. The videos below help explain things a little better. Another point was made to me by Craig Brougher: Restricting the air flow into the top of the Play block also insures that the Play valve will always come 'On' before the Rewind valve. This is accomplished by simply gluing a thin (0.007"-0.010" thick) balance rail punching over the hole in the top of the Play block -click here to see image. In this case, it's a matter of 'less mass' (air flow). So, the Play valve rises first. To return to the previous location, click here.
 To Return, click here A nickelodeon 'build-up' is a regular player piano that has been converted into a nickelodeon. There are no records about when the first build-ups were produced, but it's relatively safe to say that they didn't come along until the 1950' when the Player Piano Company, in Wichita, KS, started producing lock-and-cancel valves of this variety. Since then, many thousands of nickelodeon build-ups have been produced by dozens of different people and companies. |
| Player Piano Reference Materials - Click Here |

![]() ..To
The Top of this Page . . . . . . . . . . .
..To
The Top of this Page . . . . . . . . . . . ![]() ..To The HOME Page
..To The HOME Page
|
Since "Player-Care" is an internet business, I prefer that we correspond via E-Mail (click here to fill out the 'Request Form'). However, if I'm not in the middle of some other activity, you can reach me at 732-840-8787. But please understand that during the hours from 8AM-5PM EST (Mon-Sat), I'm generally quite busy. So, I probably won't answer the phone. If you get the answering machine, please leave a detailed message stating the reason for your call. Also, repeat your name and phone number clearly and distinctly. By necessity, I prioritize everything in my life. And, if you call and just leave your name and number, and ask me to call you back, it might be a day or two before I return your call. Why? Because I don't know why you want me to call and I might not be prepared to assist you in an effective and efficient manner. If you leave me an E-Mail address (which I prefer), spell it out phonetically. The more you do to help me, the more I can help you in return. Don't rush. You have four minutes to record your message. |
|
407 19th Ave, Brick, NJ, 08724 Phone Number 732-840-8787 (Voicemail Only, No Texts) |
