|  |  |
| | |
| Home | Manuals | Supplies | Search | Consult | Contact | Testing | Service |


|
|
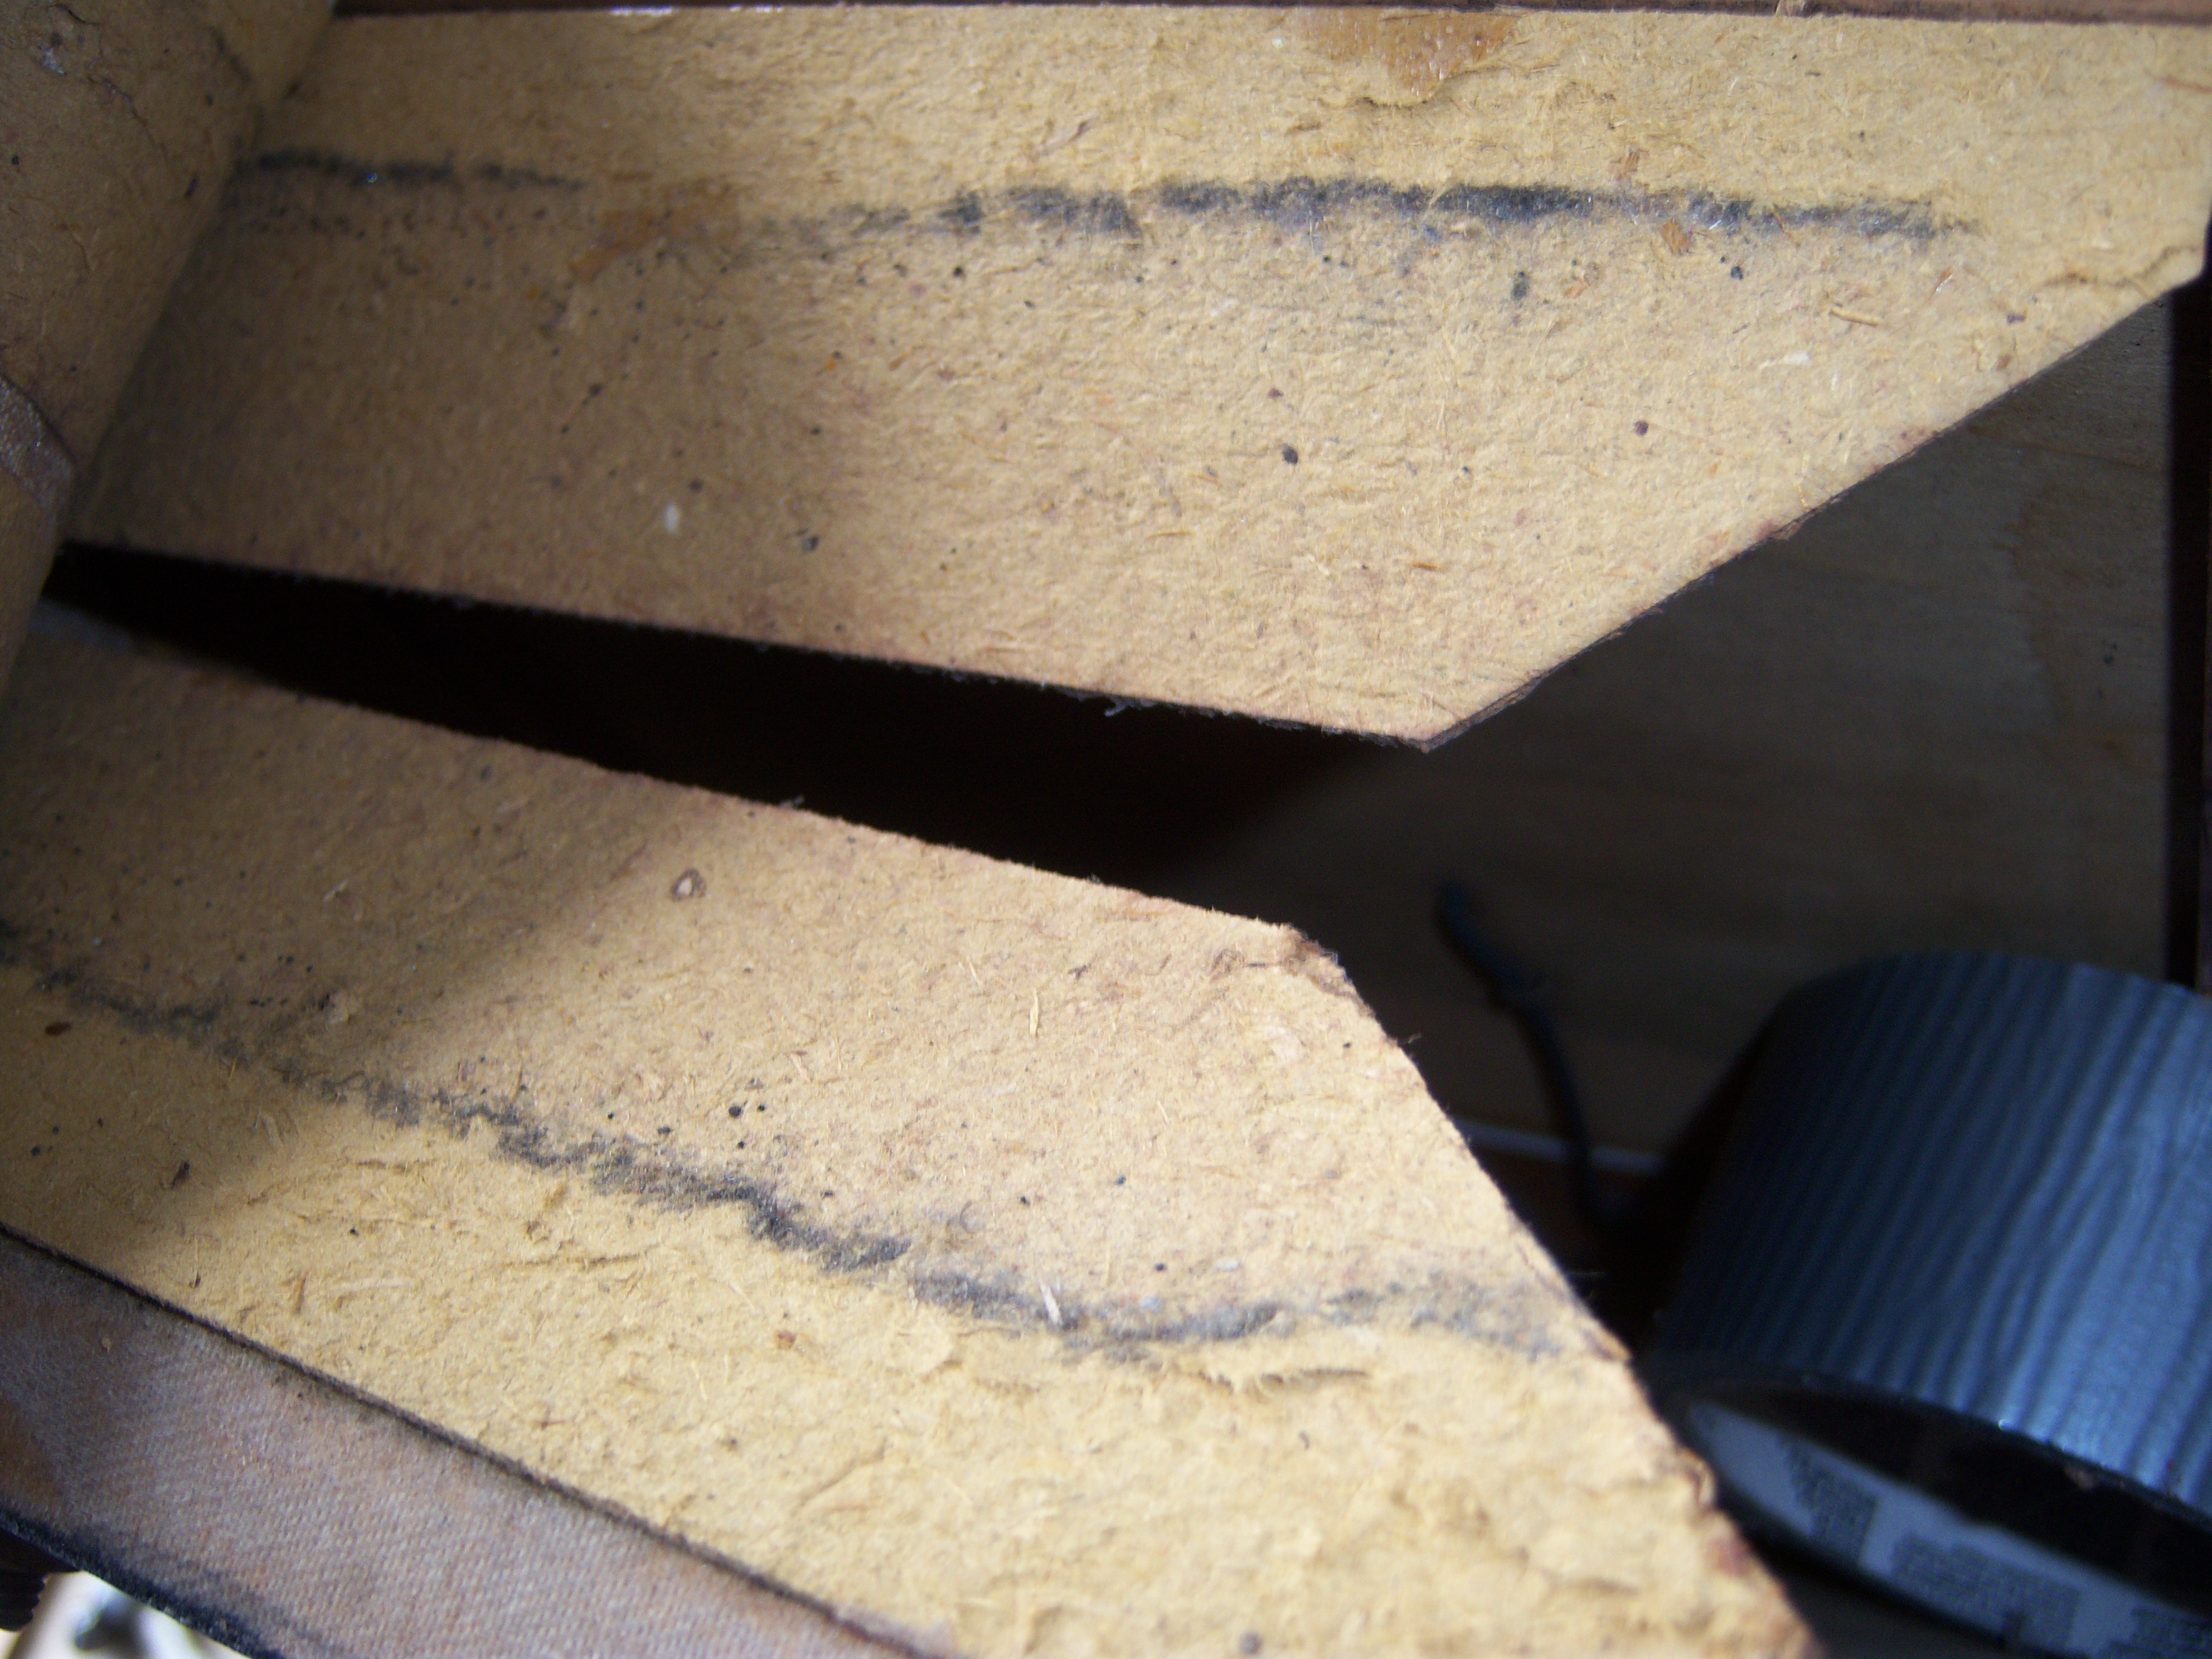
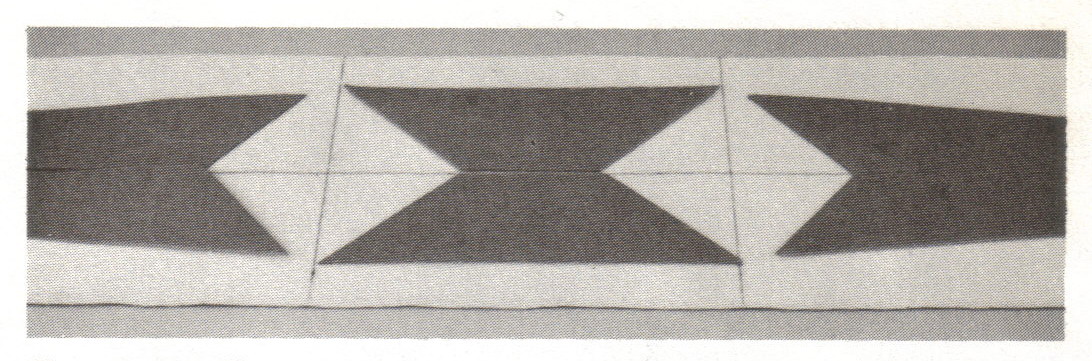
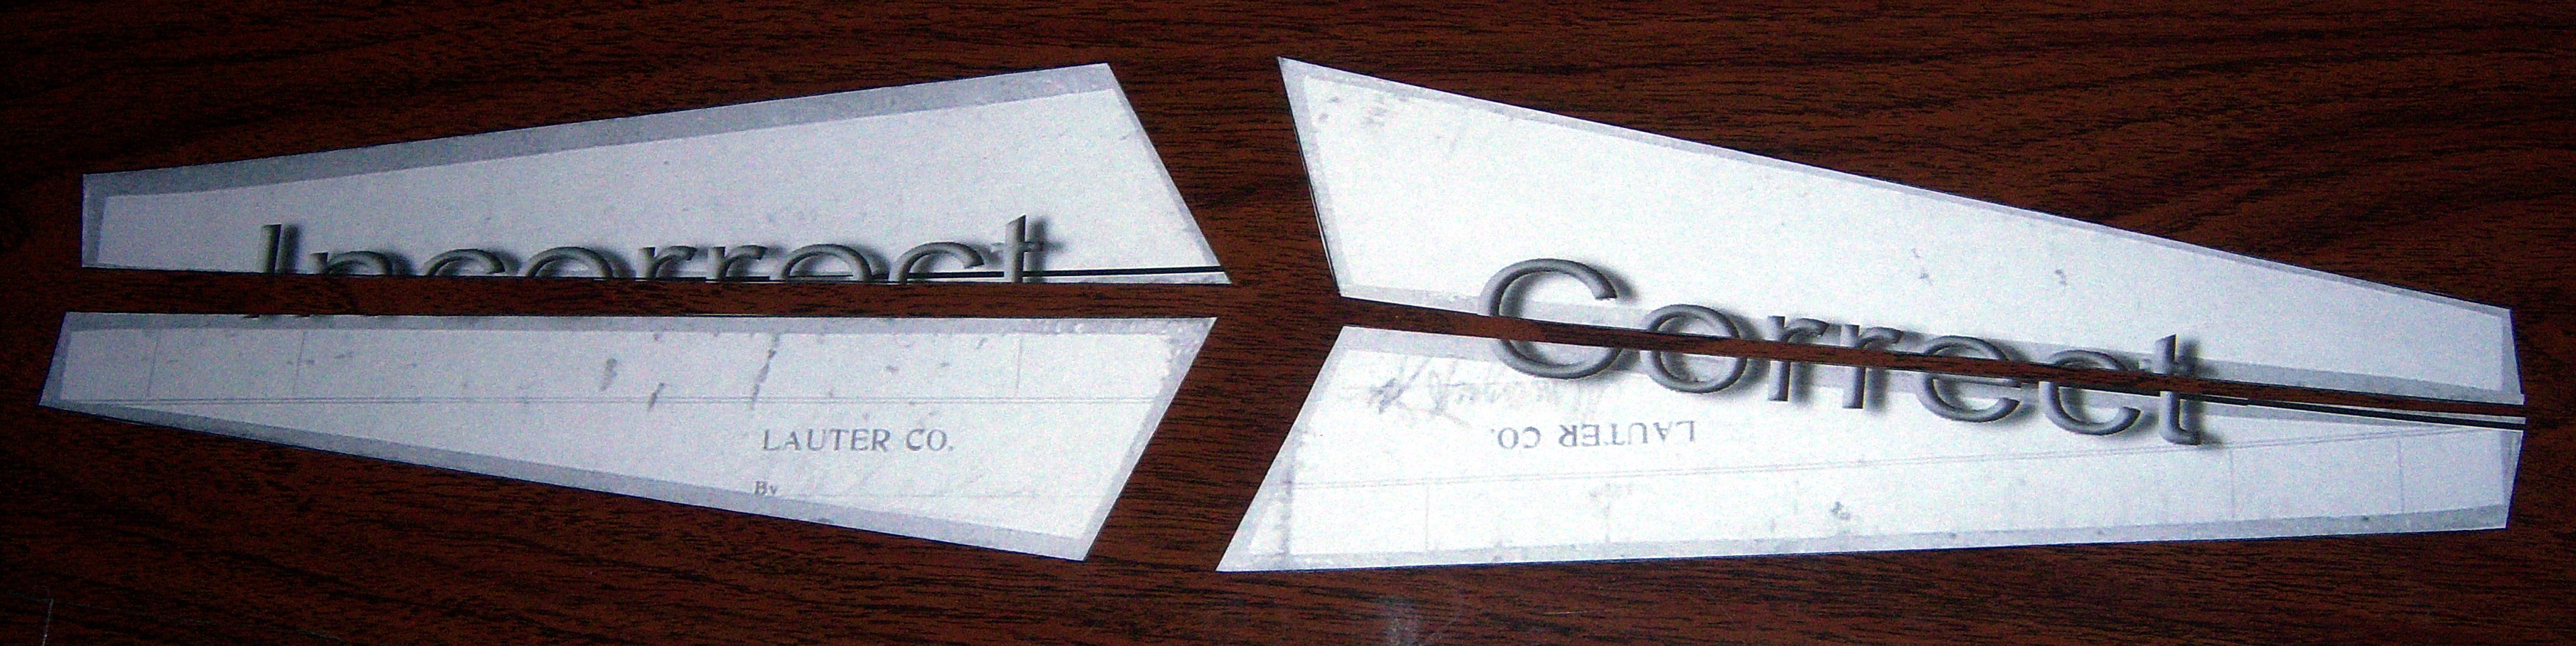
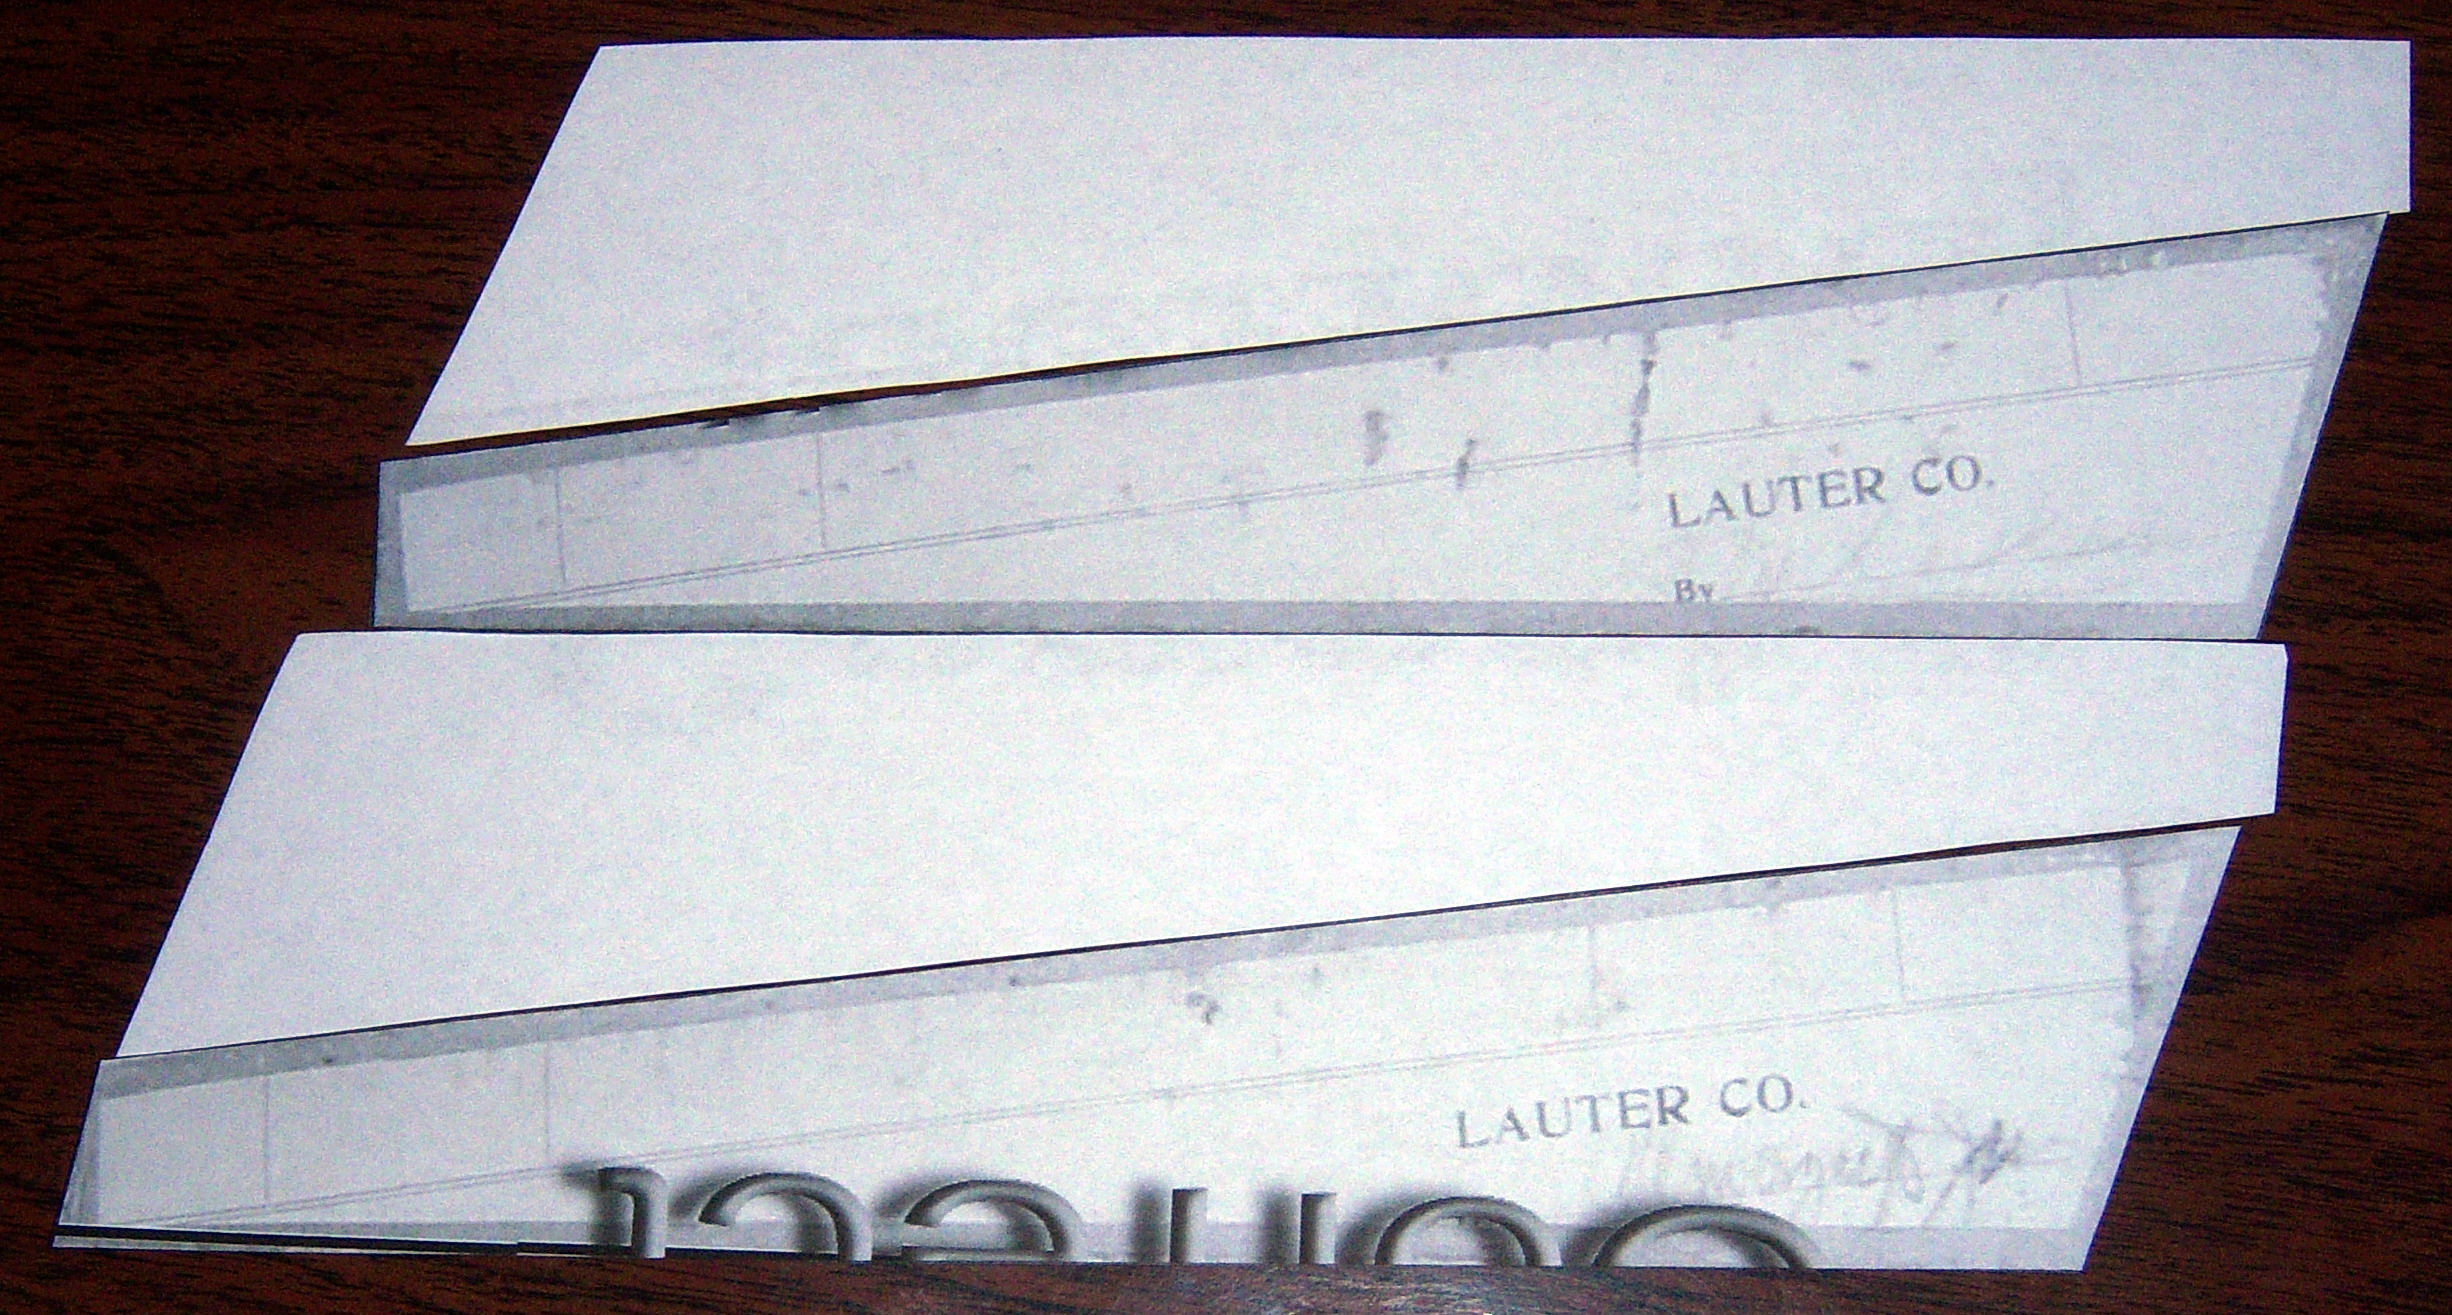
The basics of recovering the exhauster bellows in a player piano Below is a picture of the cloth, with the stiffeners, that was cut out of an exhauster bellows in a Lauter-Humana player. (Click on the image to see the full-size picture. Notice the signature of the person who built the bellow.) The part of the cloth that was glued to the wood is missing. This is just the 'insides' of the bellow. It shows the relative placement of the stiffeners and the original folds in the cloth. The black lines simulate the outsides edges of the bellows and the original centering lines. The hinged ends and the overlap portions of the cloth are not shown here. NOTE: Concerning the 'Correct' and 'Incorrect' labeling on the side stiffeners, click here. For more about the purpose of the stiffeners, click here
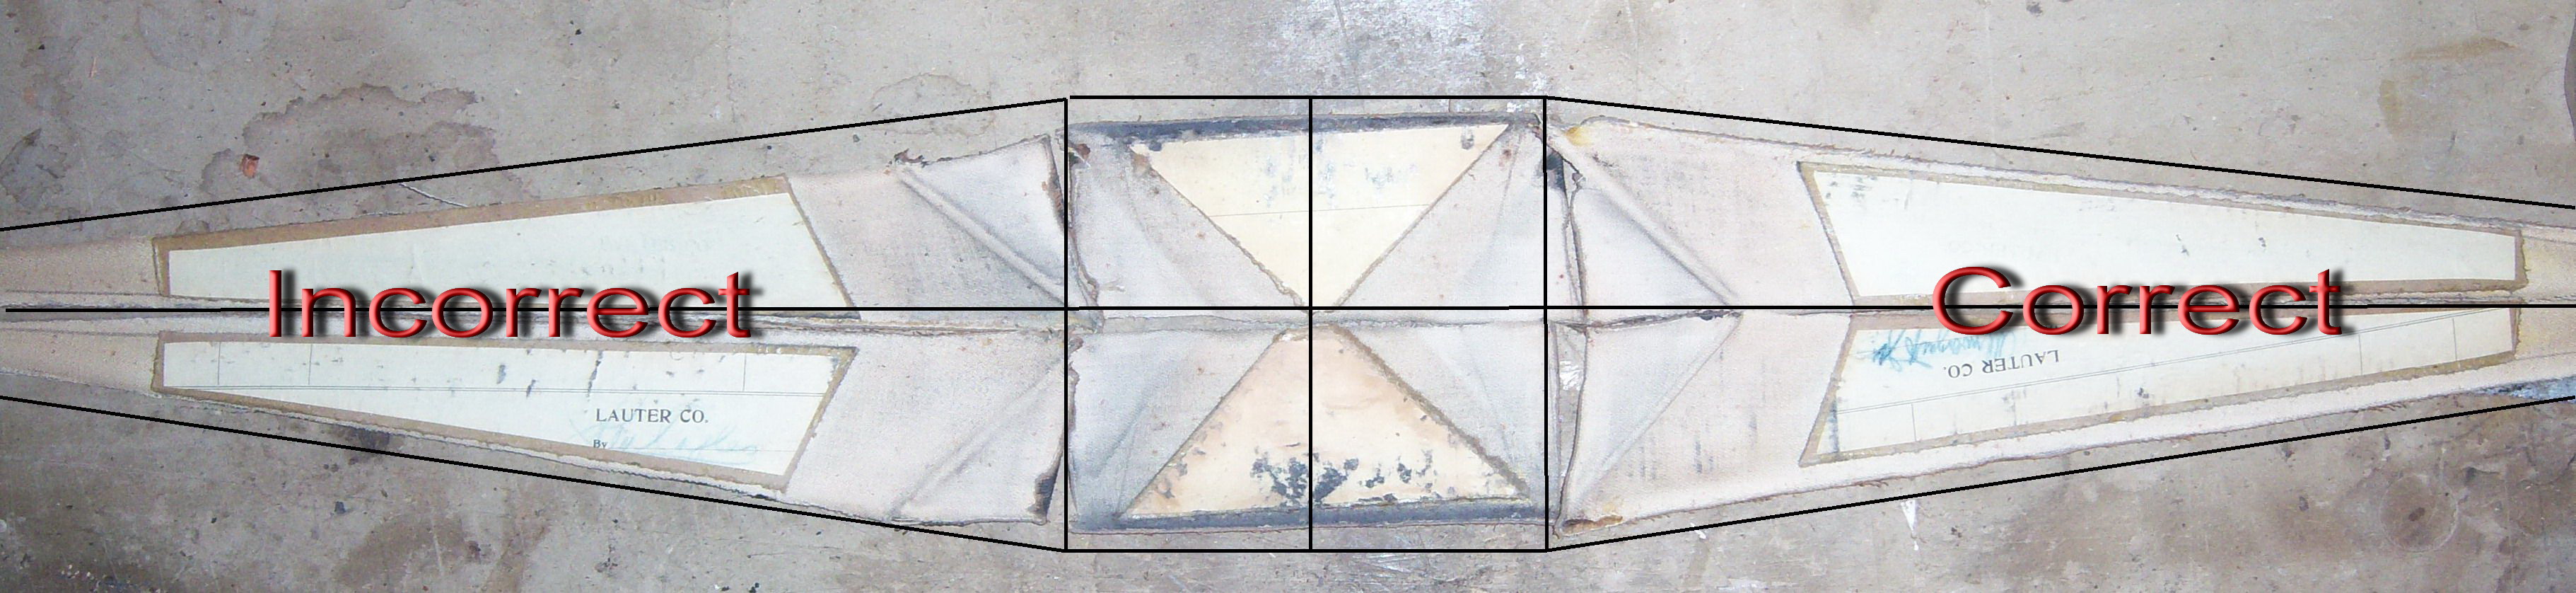 While the basics of all exhauster bellows are the same, the exact dimensions vary from manufacturer to manufacturer. And, since there have been over 100 different player system manufacturers, no one has ever attempted to record the exact dimensions of the bellows or the stiffeners. Also, there are no 'formulas' for determining the 'proper' size and location of the stiffeners. The manufacturers experimented with their particular bellows until they found the combinations that worked best for the length, width, and span of their exhauster bellows. The best material for the stiffeners is the cardboard material that's found on the bottom of large deck-type calendars. It glues easily to the cloth. However, it's important to place weights on the stiffeners while the glue is drying to prevent them from curling. Cinder blocks work really well for this job. Others recommend ironing the stiffeners before the glue fully dries. If this is done, be sure to turn the covering over and iron on the cloth side, not the side with the stiffeners. In other words, don't put the iron directly on the stiffeners. The width of the strip of heavy bellows cloth is determined by the span of the bellow. Only rarely is the span of an exhauster bellows greater than 6" (six inches). The length of the strip is determined by the total perimeter of the bellows plus the overlapping pieces. There are three ways to do the overlapping portion of the bellows on the hinged end. These are shown in the diagrams below. Since the maximum width of heavy bellows cloth is 60" (sixty inches), if you encounter a bellows with a total perimeter (including the overlap) that's greater than 60", you'll have to use technique A or B. Otherwise the technique on the right is completely acceptable, even if the original bellows utilized the 2-piece technique. 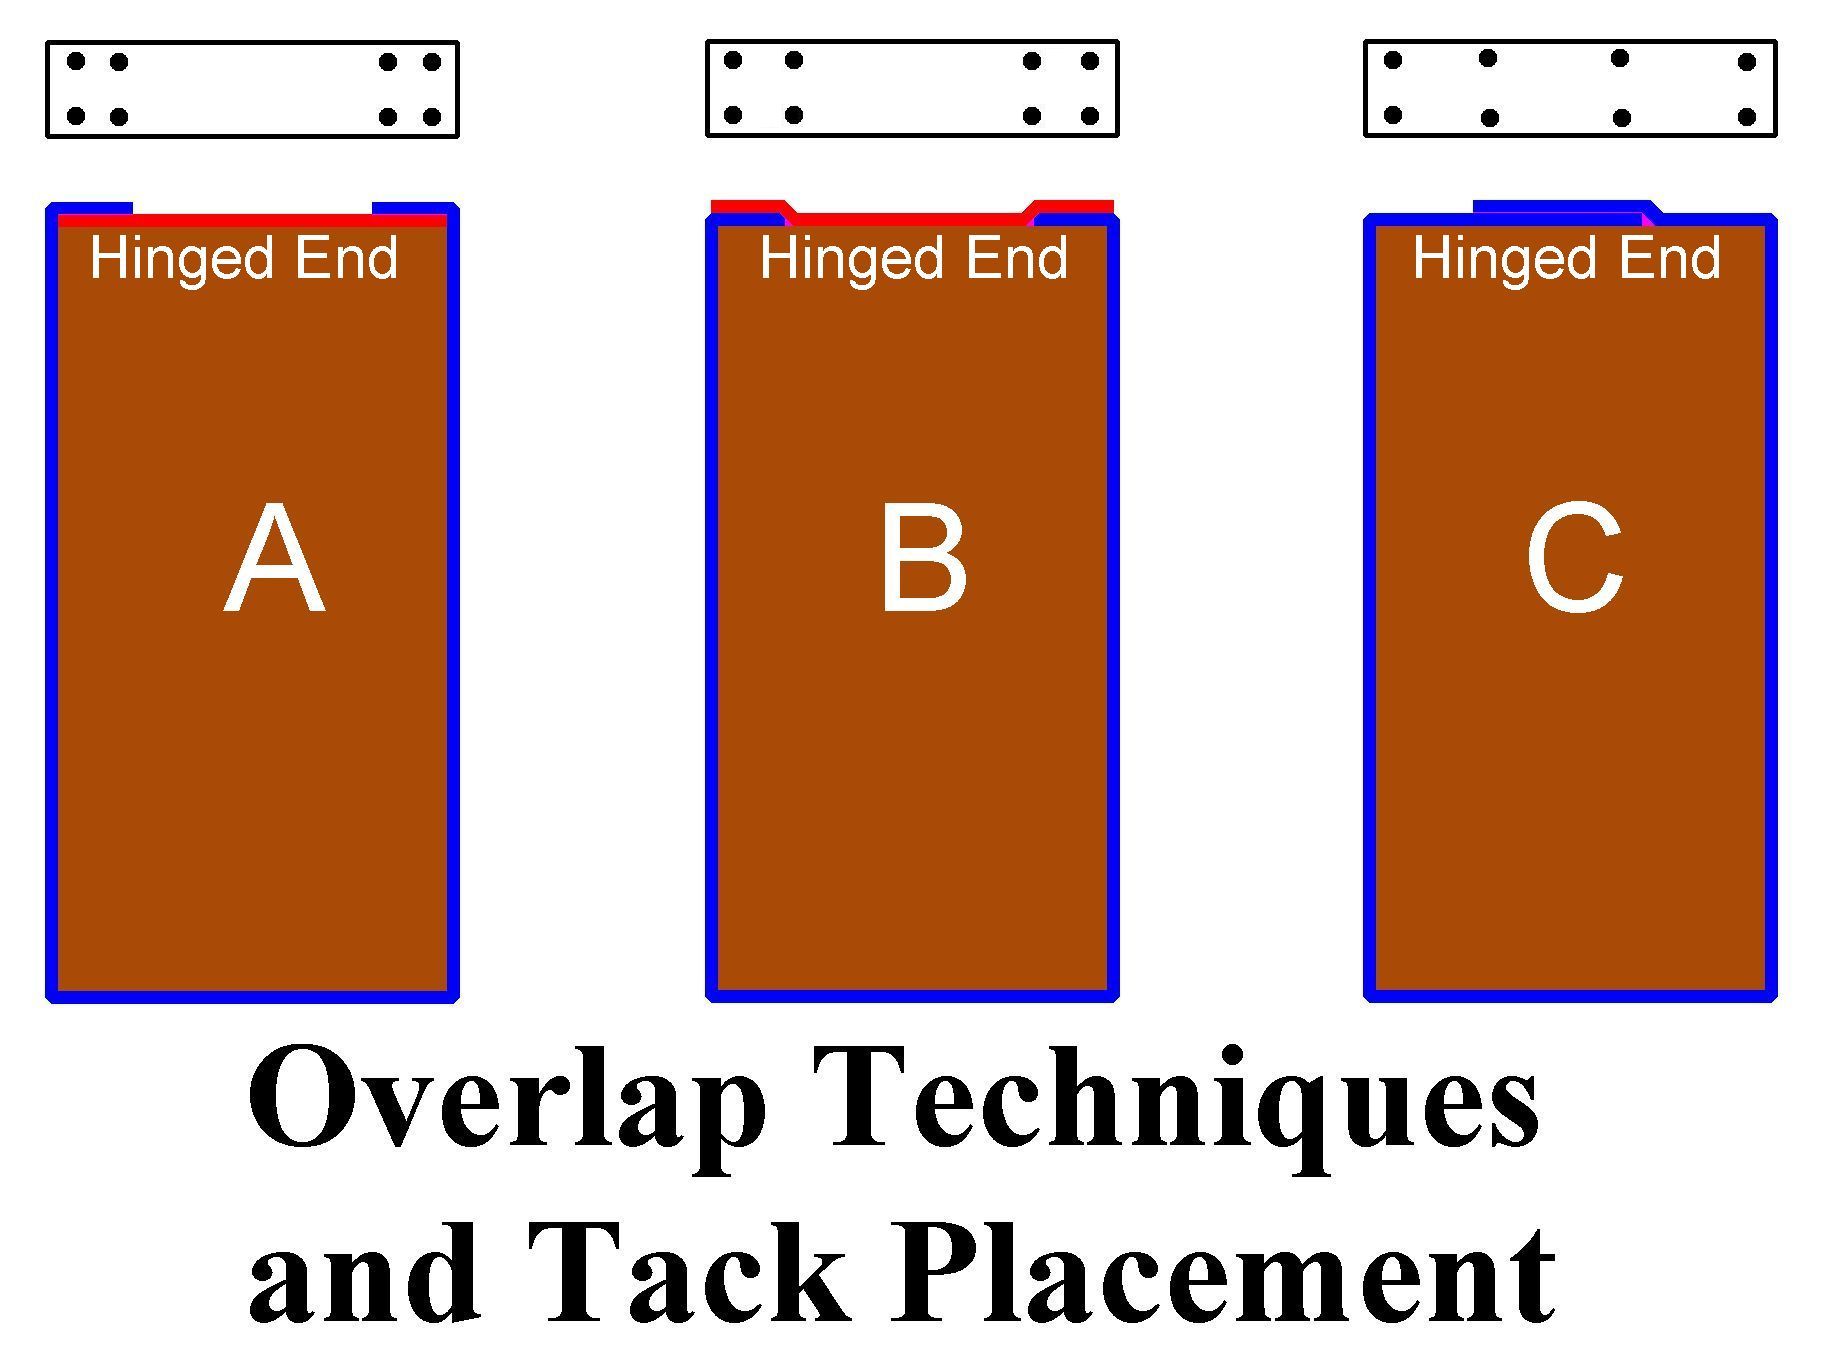 Typically, when these bellows are dismantled, exact measurements are taken of all of the stiffeners and their positions on the cloth. That way the stiffeners can be re-manufactured and glued in the exact location that they were originally. Also, there are no 'formulas' for determining the 'proper' size and location of the stiffeners. The manufacturers experimented with their particular bellows until they found the combinations that worked best for the length, width, and span of their exhauster bellows. Finally, before we get started, please note that all of the stiffeners should be glued in place before gluing the cloth to the wood. STEP 1: Mark the center of the strip. 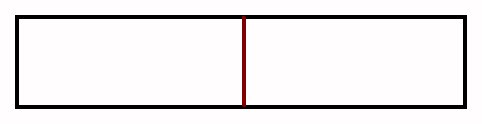 STEP 2: Mark the center of the bellows at the span end with a pencil. It's best to mark the edge of the wood. That way the mark will not be seen once the cloth is glued to the wood.  STEP 3: Using the bellows as a 'template', lay the bellows across the cloth at a 90 degree angle to the cloth, using the mark on the cloth and the mark on the bellows to center the bellows on the cloth. Then mark the outside edges and put the bellows aside. (Marks shown in orange. Also note that the lines you draw will only be the thickness of the pen or pencil you are using. The thickness of the lines in these diagrams are greatly exaggerated to make them plainly visible.) 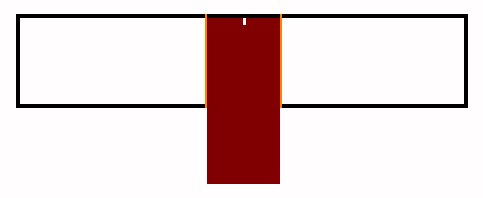 STEP 4: Using the thickness of the bellows board as a guide, mark the inside edges. This is especially important if the thicknesses of the bellows boards is different as it will effect the placement of the span stiffeners.  STEP 5: Using a straight edge, draw diagonals and then glue the span stiffeners in place. Be sure that the edges of the stiffeners are no less than 3/16" from the marks on the cloth. If they are, the cloth will not fold correctly and stretching will occur. This will dramatically shorten the life of the cloth at the folds. Also, since the stiffeners have a natural tendency to curl when drying if not weighted in place, it is strongly recommended that weights are used to hold the stiffeners flat to the cloth as they dry. Cinder blocks or bricks work well for this task.  STEP 6: Using the bellows as a template, lay the bellows on the cloth and mark along the inside edges of the boards. Then, using a straight edge ruler, draw a line from the center of the 'X' to the point where the bellows boards meet (at the hinged end). Then extend that line such that you end up with a straight line running the full length of the cloth in the middle. (NOTE: You can draw the center line at the beginning of this entire process IF the width of the bellows boards is identical. This will make aligning the bellows diagonally easier.) Now remove the bellows from the cloth.  STEP 7: This is a very critical step. When positioning the side stiffeners, you must maintain the same spacing as you did with the span stiffeners (3/16" from the lines). Hopefully you have the original piece so you can measure the distance from the center of the span stiffeners to the forward edge of the side stiffeners.  STEP 8: When gluing the wood to the cloth, it's really important that you get the span (or the bottom part) in exactly the right place. I normally lay the bellows down longways on its side and then 'roll' it up to the span side to verify that everything is going to be 'square' before I apply the glue. This is good to do in case the two bellows boards aren't exactly parallel with each other or if one or both of the boards is slightly warped. STEP 9: After the span side is glued, I apply the glue to the wood on the side and then lay the bellows down onto the cloth. (This is just the opposite of what Craig does in his video.) By doing it in this manner, you can see down inside of the bellows and make sure that the stiffeners are centered. Then, as soon as you've placed the bellows on the cloth after the first gluing, lift it back off to check the glue pattern. Once you're sure the glue is evenly spread on the cloth and wood, apply the last thin coating of glue and press the wood hard onto the cloth. Naturally, double-gluing, tacking, and ironing are absolutely necessary. NOTE: Also, unlike Craig, I always allow the glue to dry when doing each portion of the job before moving on to the next section. That way there's no chance of the cloth pulling away from a section that was just finished while doing the next section.
Replacing the bellows boards Occasionally, the bellows boards will need to be replaced. I recommend using 5/8" marine quality veneered plywood. It has excellent stability and strength. Once it's cut to size, it needs to be prepared for service as follows: The inside and outside surfaces should be treated with sanding sealer first. Then the outside should be fine sanded with 150 grit and then sealed again, then fine sanded again. Then, most people paint the outside black with spray paint for appearance sake -but it's not 'required'... I use Krylon... Be sure to tape the edges so nothing gets on them during the sealing and painting process. Then seal the edges with hot hide glue until the glue stops soaking into the wood. Then sand the edges smooth with 150 grit. If the hinge is mounted on the inside or the bellows, as opposed to the top edge, it's best to put tape over the area where the hinge will go when you're sealing the inside. The hide glue sticks better to the wood than it does the sealer. Here again, pre-glue the area where the hinge will go so you get excellent adhesion when gluing the hinge in place. If there are any holes in the board (like for where the flaps go), be sure to seal the inside of the holes with hide glue and then sand the area smooth with 150 grit. It's also generally a good idea to dust the area where the flap goes with powered graphite. This prevents any possible sticking of the flap leather to the wood surface. In a case where the old boards are screwed to the main wind trunk from INSIDE the bellows, it's my recommendation that holes be drilled through the outside board so that the screws can be accessed AFTER the bellows has been recovered. Once the bellows is secured to the trunk, small 1" circles of heavy bellows cloth should be glued in place to cover the access holes. NOTE: Back when these things were being mass produced, they had special jigs for applying the cloth. We don't have that luxury. I'm sure that their thought was that they needed to be certain that the bellows board was securely sealed to the trunk. There were a number of different techniques that were used to seal the board to the trunk. In most cases, the screws that held the board to the trunk went through the trunk from the front of the trunk. In other cases, extra pieces of wood were mounted to the edges of the board, and screws through those boards were used to secure the board to the trunk. Then, there was the kind with the mounting screws inside the bellow..... However, it was more common that if the screws were inside, the manufacturer also had access holes on the outside board that were covered with circles of heavy cloth after the bellows was glued and screwed in place... |

![]() ..To
The Top of this Page . . . . . . . . . . .
..To
The Top of this Page . . . . . . . . . . . ![]() ..To The HOME Page
..To The HOME Page
|
Since "Player-Care" is an internet business, I prefer that we correspond via E-Mail (click here to fill out the 'Request Form'). However, if I'm not in the middle of some other activity, you can reach me at 732-840-8787. But please understand that during the hours from 8AM-5PM EST (Mon-Sat), I'm generally quite busy. So, I probably won't answer the phone. If you get the answering machine, please leave a detailed message stating the reason for your call. Also, repeat your name and phone number clearly and distinctly. By necessity, I prioritize everything in my life. And, if you call and just leave your name and number, and ask me to call you back, it might be a day or two before I return your call. Why? Because I don't know why you want me to call and I might not be prepared to assist you in an effective and efficient manner. If you leave me an E-Mail address (which I prefer), spell it out phonetically. The more you do to help me, the more I can help you in return. Don't rush. You have four minutes to record your message. |
|
407 19th Ave, Brick, NJ, 08724 Phone Number 732-840-8787 |